Firstly, let's remind ourselves of what we were up against.
 |
The lovely light fitting we've been living with. Complete
with the *concrete* they'd used to fill the channel. |
 |
| The non-working doorbell |
 |
| A good shot of the carpet and wall |
The hall has been a labour of love (read: pain the ass). But, this most neglected of spaces (so neglected in fact, that it was difficult to find many "before" photos) will be the first thing that people see when they walk in the door. The new looks staircase has helped to create a certain "wow-factor" as you walk through the door but it is let down by the rest.
Preparation wasn't too difficult as the previous owners had kindly stripped most of the wallpaper before we got there. Though, curiously had left the ceiling papered. I guess it is a bit of a reach and seems to follow the pattern of "that looks more difficult, so we'll leave it for some other poor sod" which we've seen all over the house.
The first idea was to just paint it but after a quick test patch we (I) decided against that approach. The finish it left was simply too uneven for such a large area. Re-plastering would have involved quite an outlay as the old plaster was pretty crumbly and may have needed replacing so, as a (much) cheaper alternative we decided on lining paper.
This proved to be more difficult than we'd hoped. The plaster was so dry and crumbly that getting the paper to stick to it was a real pain. The seams peeled up a lot and peeled up even more after the paper was painted. The trick is to paint the wall with a coat or two of wallpaper paste and let it dry first. Then put the paper up. The seams were still popping up but not nearly as bad.
 |
| Pasting the wall after I realised this was the way to do it. |
 |
No, this seam isn't popping up. It's a trick of the light. What's that under my hand?
A bucket. Oh, you mean the other hand, huh? |
 |
| New light fitting highlighting the seams. D'oh! |
So, then we filled and little bits and stuck down the seams. Then painted with a cream colour and stuck down the seams. Then finally touched up any seams that had been stuck down and then stuck them back down again. There's still a couple to do but I'm sick of them for now.
Some finishing touches. Firstly, some coving in the hall and some moulding to go up the stairs and then a handrail as the top of the stairs is a bit of a deathtrap for unsteady inlaws and increasingly waddly wives.
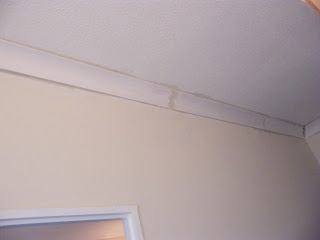 |
| It looks better now it's painted. I promise. |
 |
| And then she waddled away. Waddle waddle. |
Then, some carpet. Once again, our tame carpet fitter came round in his spare time.
 |
| Removal of the non-functioning burglar alarm is on my list. As is painting under the stairs. |
And to finish off, paint the no-longer-matching front door a nice, contemporary cocoa bean brown.


